
This chapter is a direct continuation of Chapter 1.
In Chapter 1, you studied which hands to shove (All-in) in GTO Heads-Up and which hands to not shove (Not All-in).
Here, we review these push charts and then make things a bit more complex. Rather than choosing between All-in and Not All-in, you’ll need to choose precisely among All-in, Min-raise to 2 BB (MR), Limp, or Fold.
In GTO, the SB in HU alternates a lot between Min-raise and Limp when it doesn’t shove.
These hands can be grouped into four categories:
Of course, this evolves with the effective stack.
What should you do when a hand can either Min-raise or Limp?
Theoretically, you’re supposed to use a randomizer to decide randomly between Min-raise or Limp.
🎲 A randomizer gives you a random number between 0 and 100.
Based on that number, you choose one of the two actions. For example, for Q4o between 18 and 20 BB (chart above):
But in practice, using a randomizer at the tables is cumbersome, especially when multi-tabling.
Don’t stress about trying to Min-raise exactly 25% or 50% of the time. Go more by feel, while avoiding always choosing the same action, otherwise your game will become unbalanced.
Of course, in an exploitative context it’s different: you can absolutely overuse Min-raise if your opponent doesn’t adjust. Striving to be balanced is no longer the goal.
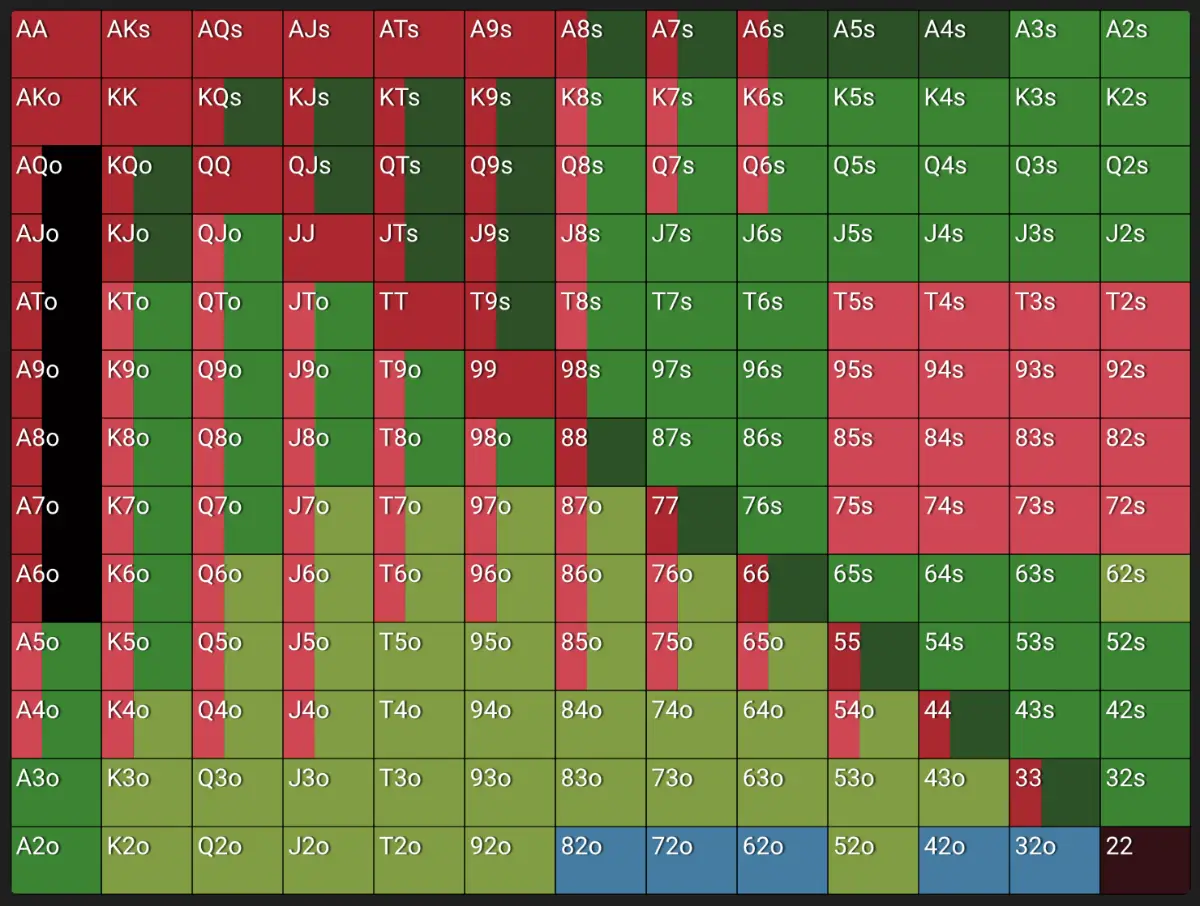
Between 12 and 20 BB, you have a Min-raise block on the right side of the chart, roughly between T5s, T2s, 75s, and 72s.

In practice (per GTO), these hands are Min-raised about 80% of the time and Limped about 20% of the time.
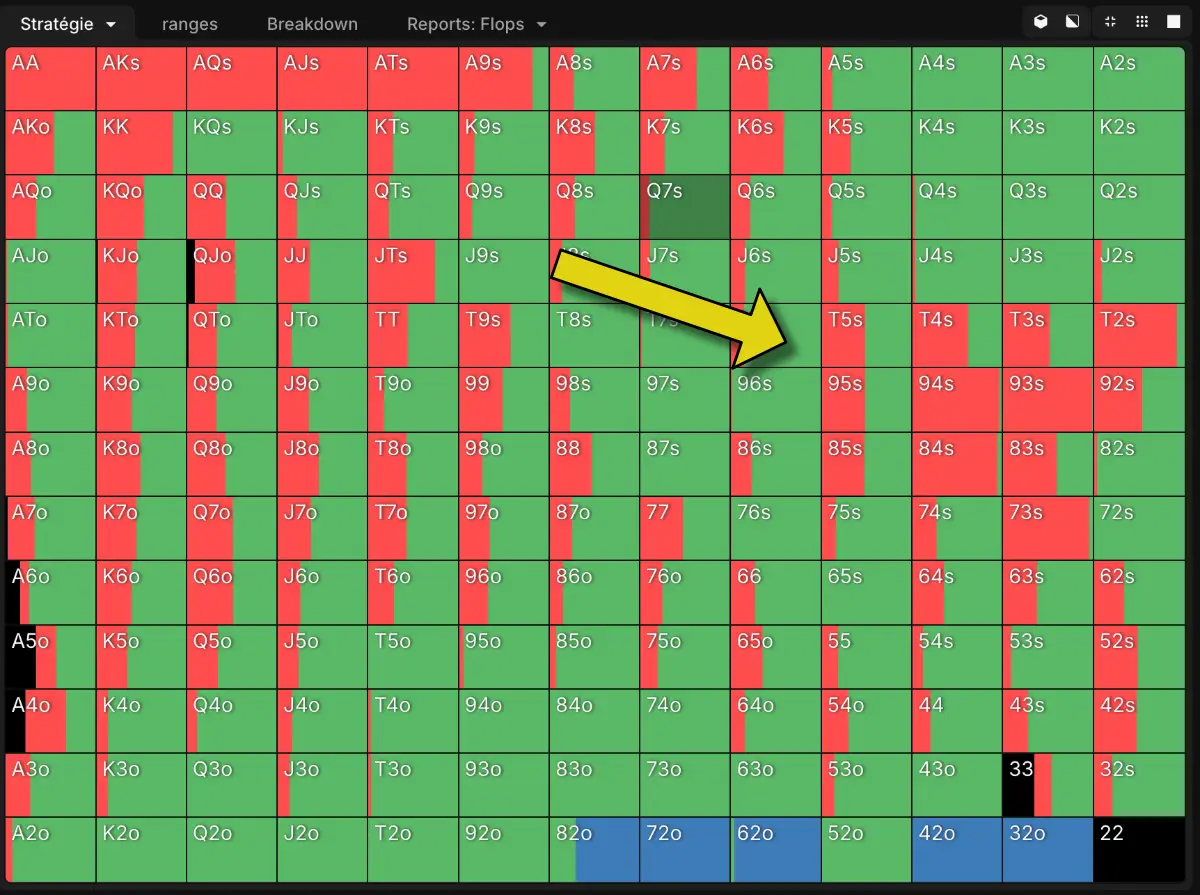
But to make this human-memorizable, we grouped all of that into a single Min-raise block.
However, in the trainer we do accept Limps with these hands, since, as you can see, GTO does Limp them part of the time.
Don’t spend too much time studying the 14–25 BB charts.
You’ll play most of your hands with fewer than 14 BB. Those blind levels should be your priority.