
In this chapter and the next one, you will learn how to correctly defend the Big Blind (BB) against an opponent’s all-in in Heads-Up play.
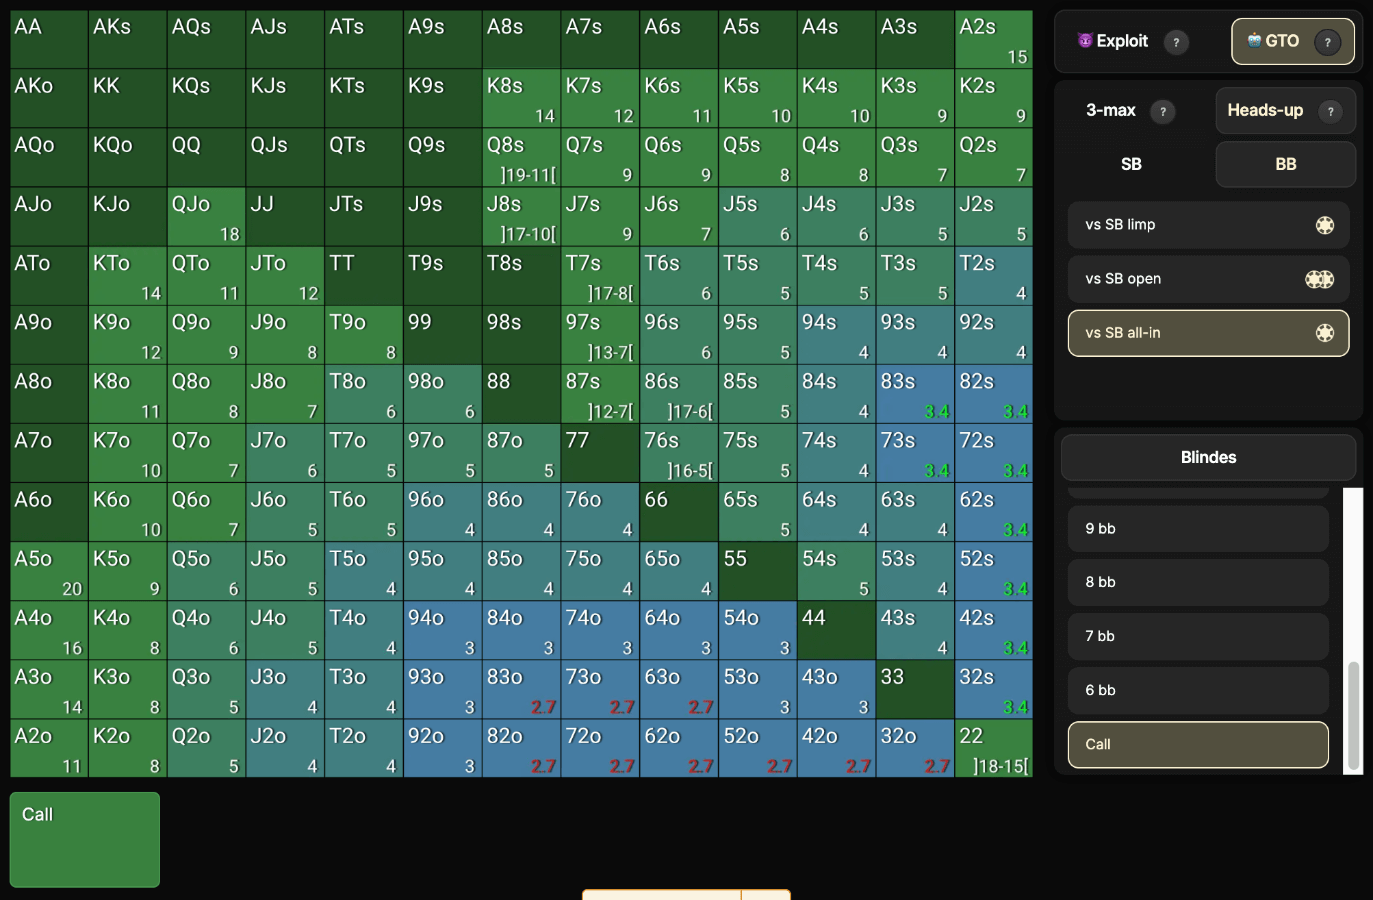
This is the BB vs SB all-in (Heads-Up) situation in the charts.
And it’s an important change compared to the previous chapters: here, you are reacting to your opponent’s action. These chapters are therefore focused on defense, not aggression.
🧠 These two chapters are among the most technical in the course.
Take your time, it's completely normal that the learning process is gradual.
We will analyze the GTO call ranges from the BB in Heads-Up, meaning the theoretically optimal ranges for:
Be careful, these ranges are more complex than they appear!
At the tables, your opponents will often have very different push frequencies from one another. Even between two recreational players, behaviors can vary drastically.
Of course, since this is a GTO chapter, opponent adaptation shouldn’t be the main focus.
But I’m mentioning it anyway to emphasize that these charts should not be applied rigidly, except against regulars who play perfectly GTO. Keep this idea in mind.
Adaptations against recreational players will be explored in the next chapter.
➡️ Direct consequence: you will often need to adjust your ranges depending on your opponent, sometimes even against certain good players. In short, you will rarely play purely GTO.
Again, we’ll dive deeper into these adjustments in the next chapter.

One might think that the shorter the stack gets, the more marginal hands you can call, but that’s not necessarily true.
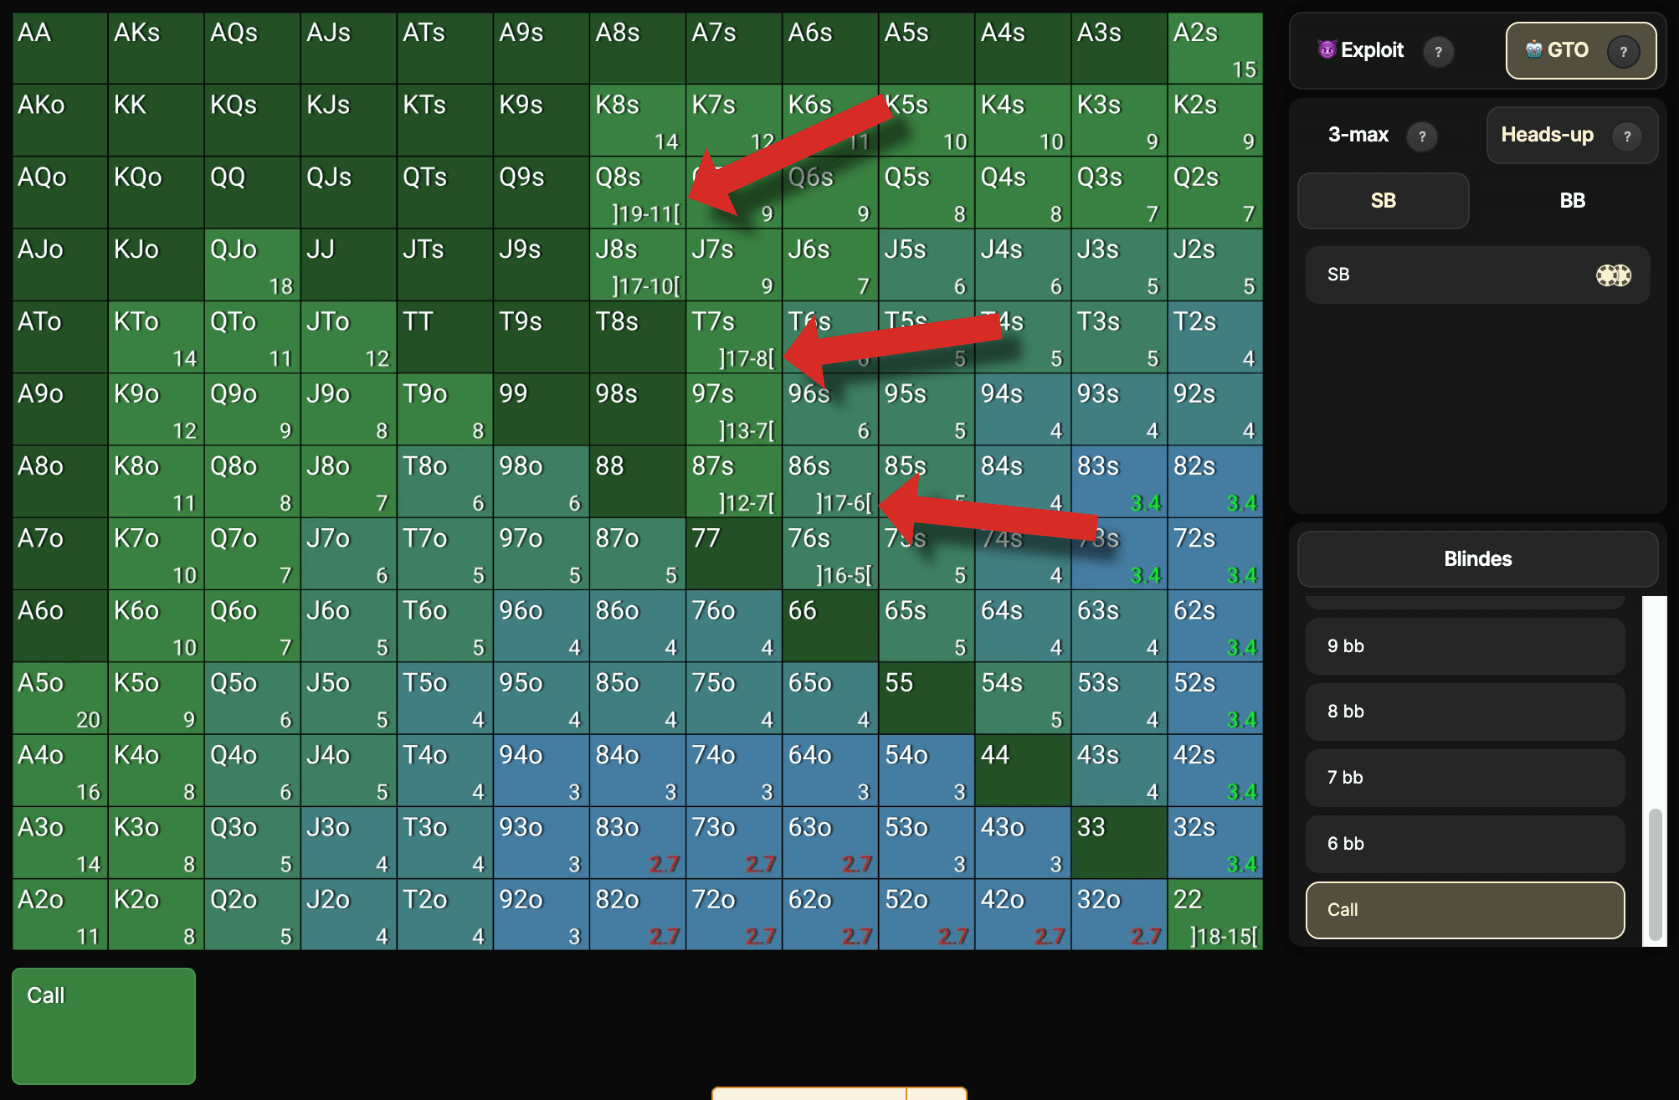
The GTO calling ranges do not follow a simple progression.
Suited connectors (like 87s) may:
Be a call when deep
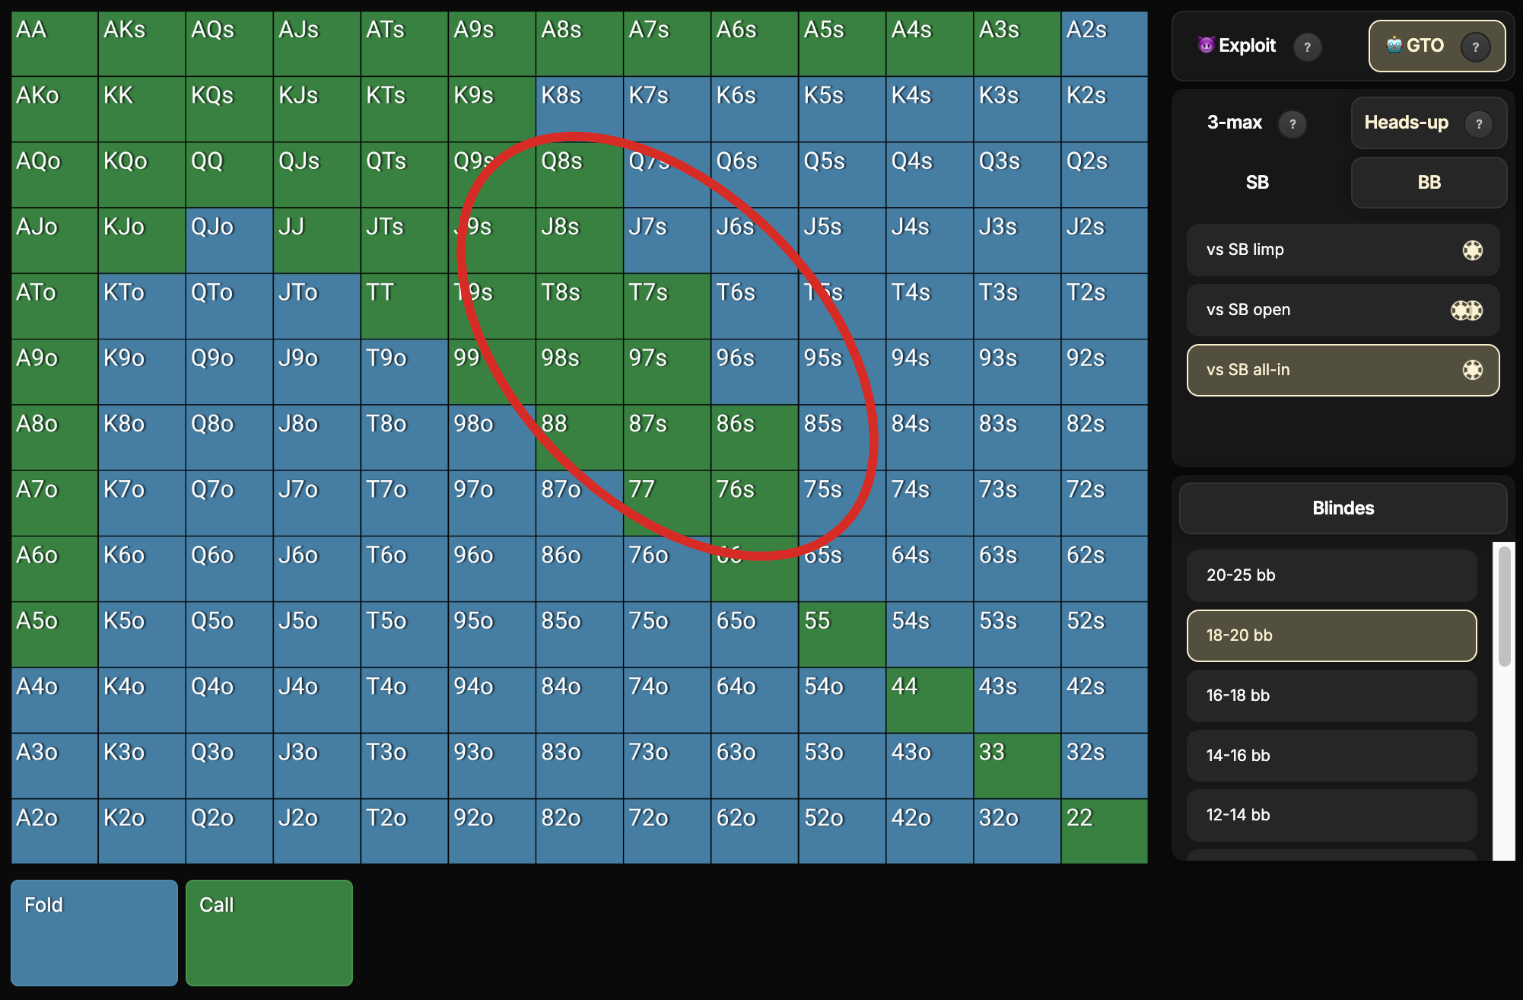
Become a fold around 10–14 BB
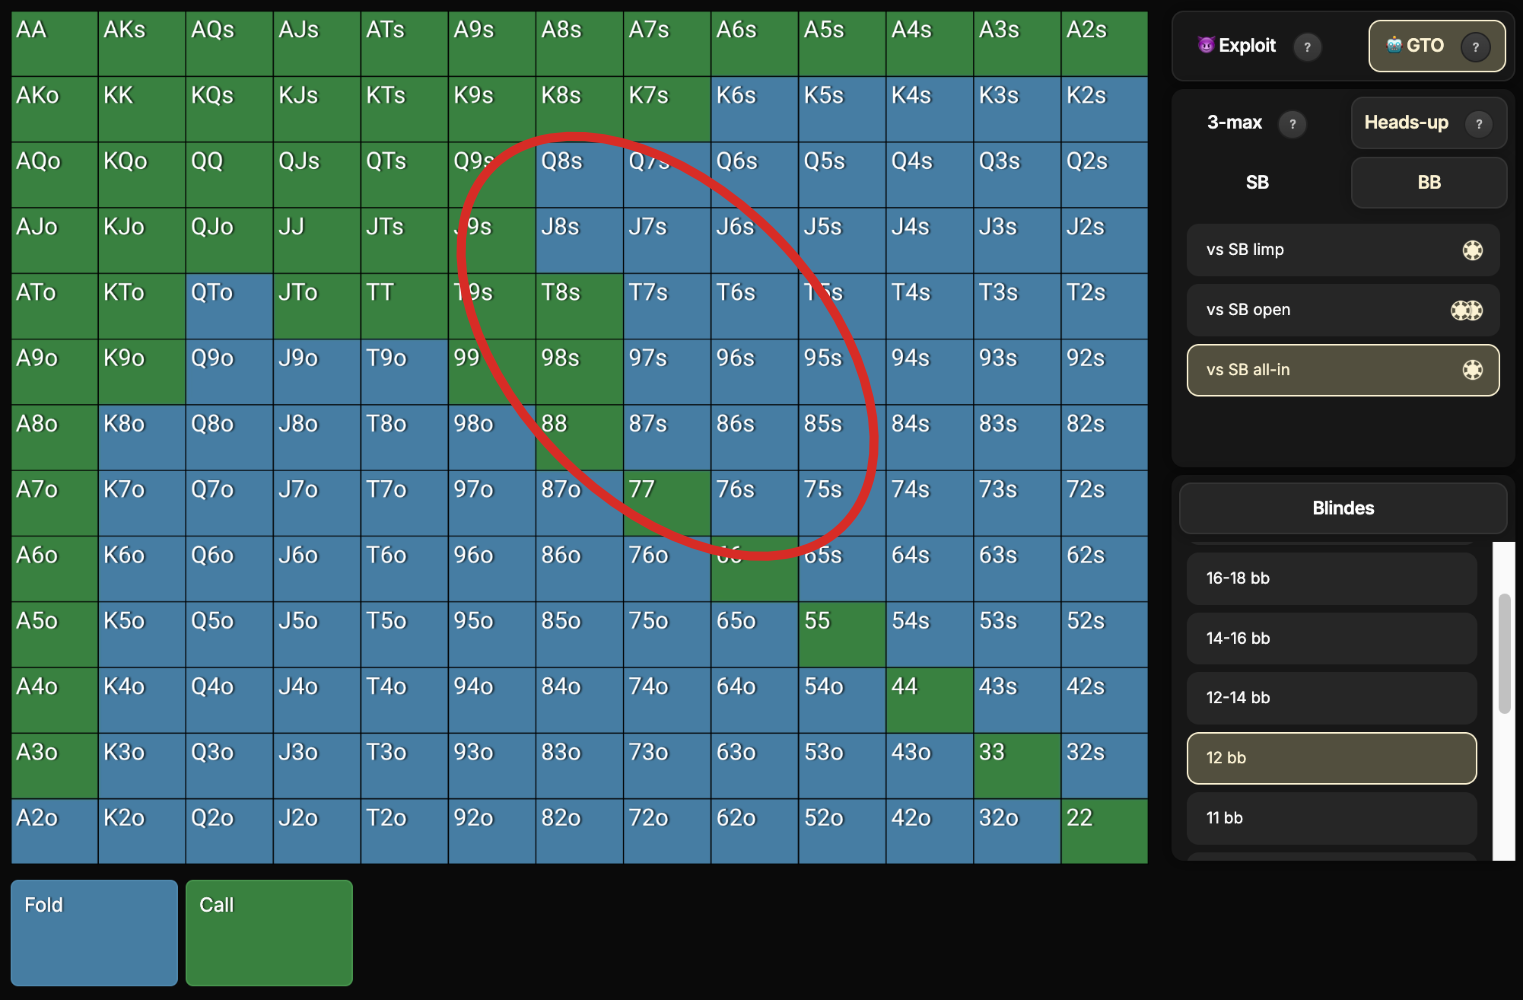
Become a call again when very short
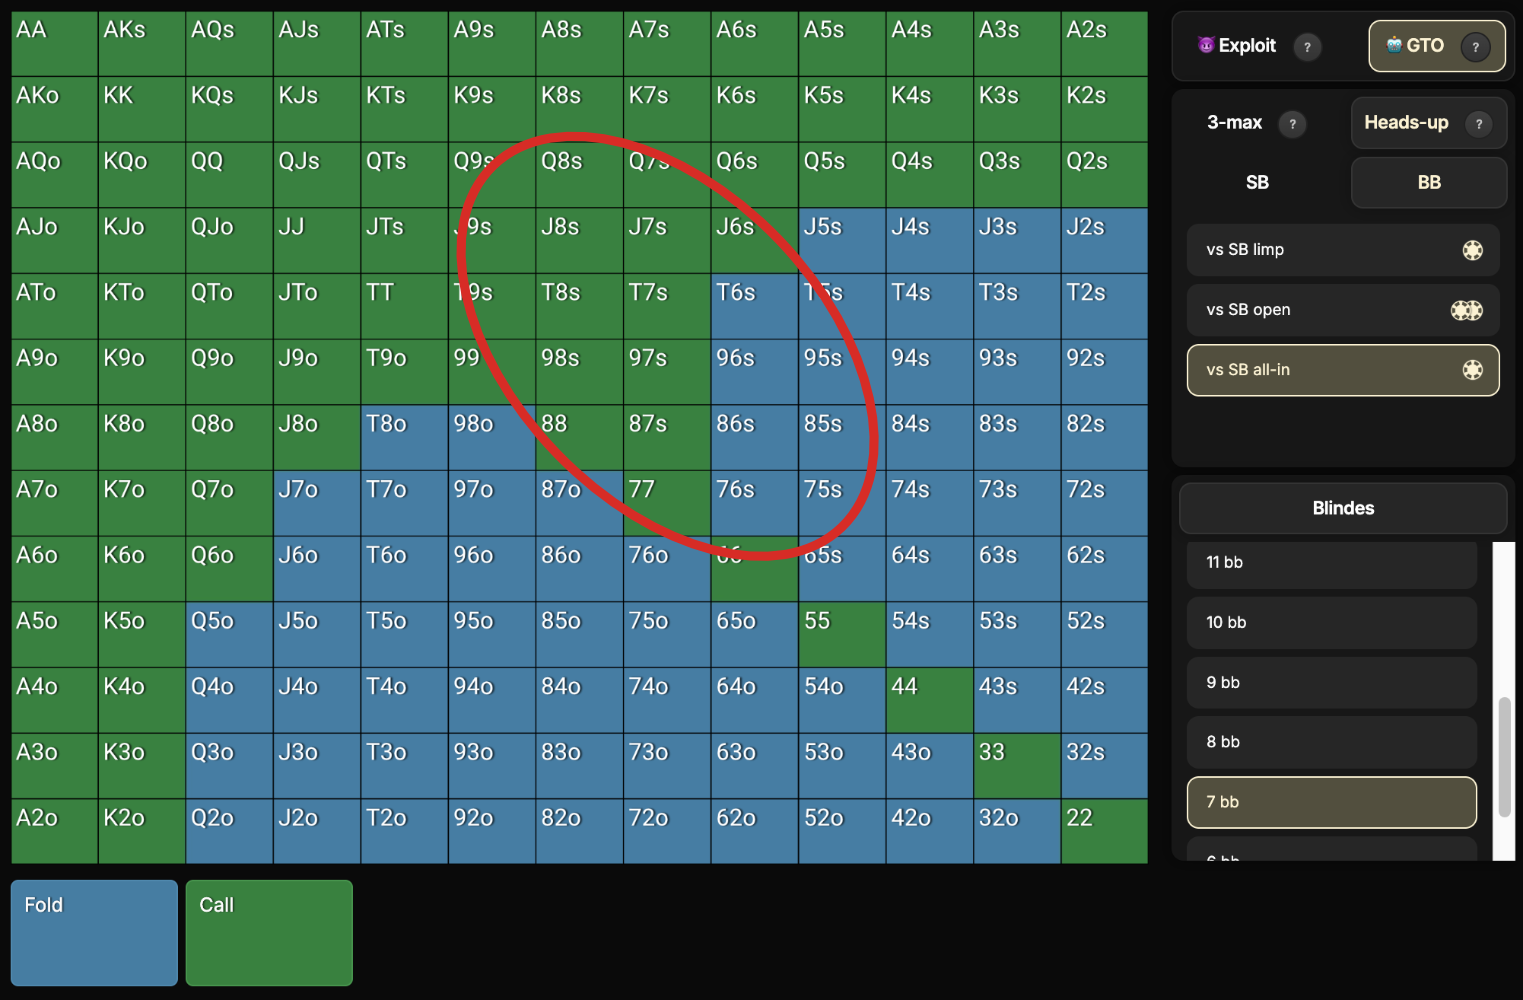
Because the SB’s pushing range changes depending on the effective stack.
Key takeaway: a hand that is a call when deep is not always a call when shorter.
There is a lot to learn in this chapter, so here are a few tips to help you memorize the call ranges more easily:
Here are a few simple rules that will serve as anchors:
Certain hands are automatic calls regardless of your stack size.
Knowing them helps you build confidence and speed up your decision-making.
-> These are the cells where there is no number.
These are the famous hands mentioned earlier, the ones that call when deep, then fold, then call again when very short.
👉 These details concern only mid- and high-stakes regulars.
They will appear in the “Hardcore mode” questions.
You don’t need to learn them if you mainly play low-stakes against recreational players.
This is a zone you will encounter frequently, and where you must maximize EV.
Once you master the 3–8 BB zone inside out, you’ve completed a very large part of the journey.

💨 Finally, if you play low stakes… breathe.
You don’t need to learn every detail to be a winning player.
Focus on: