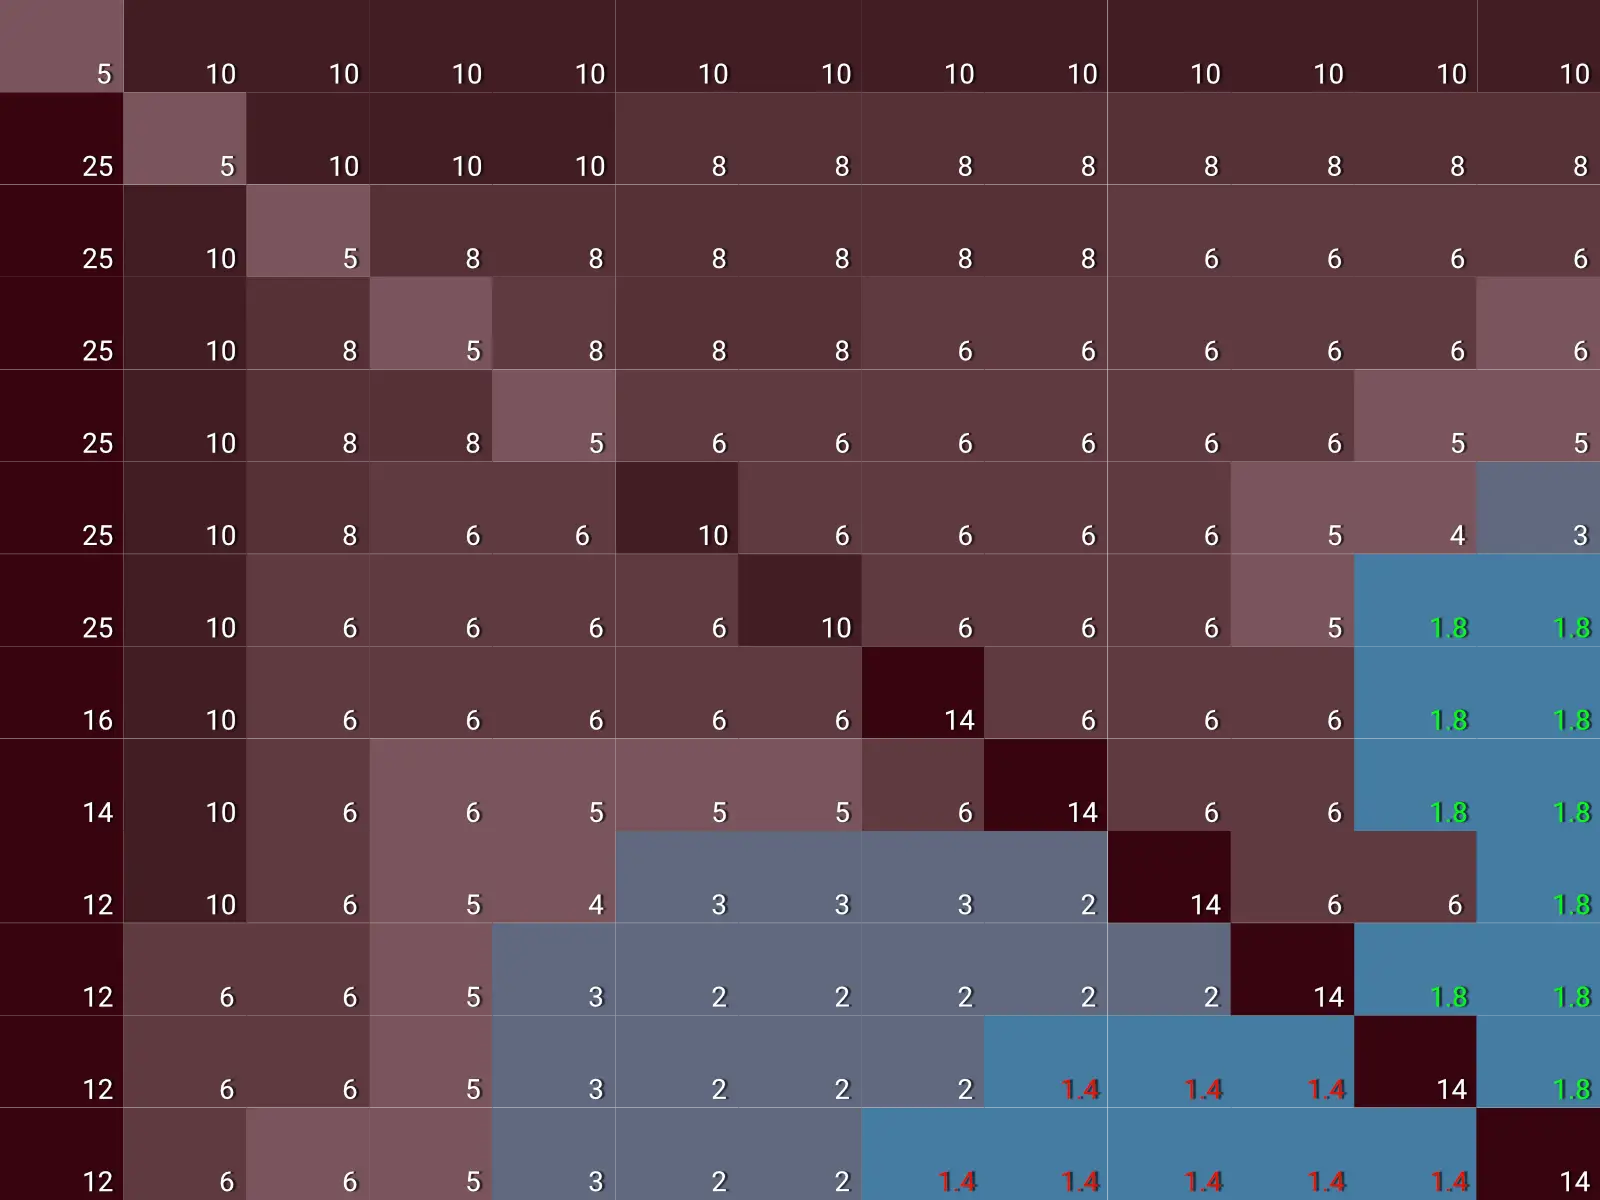
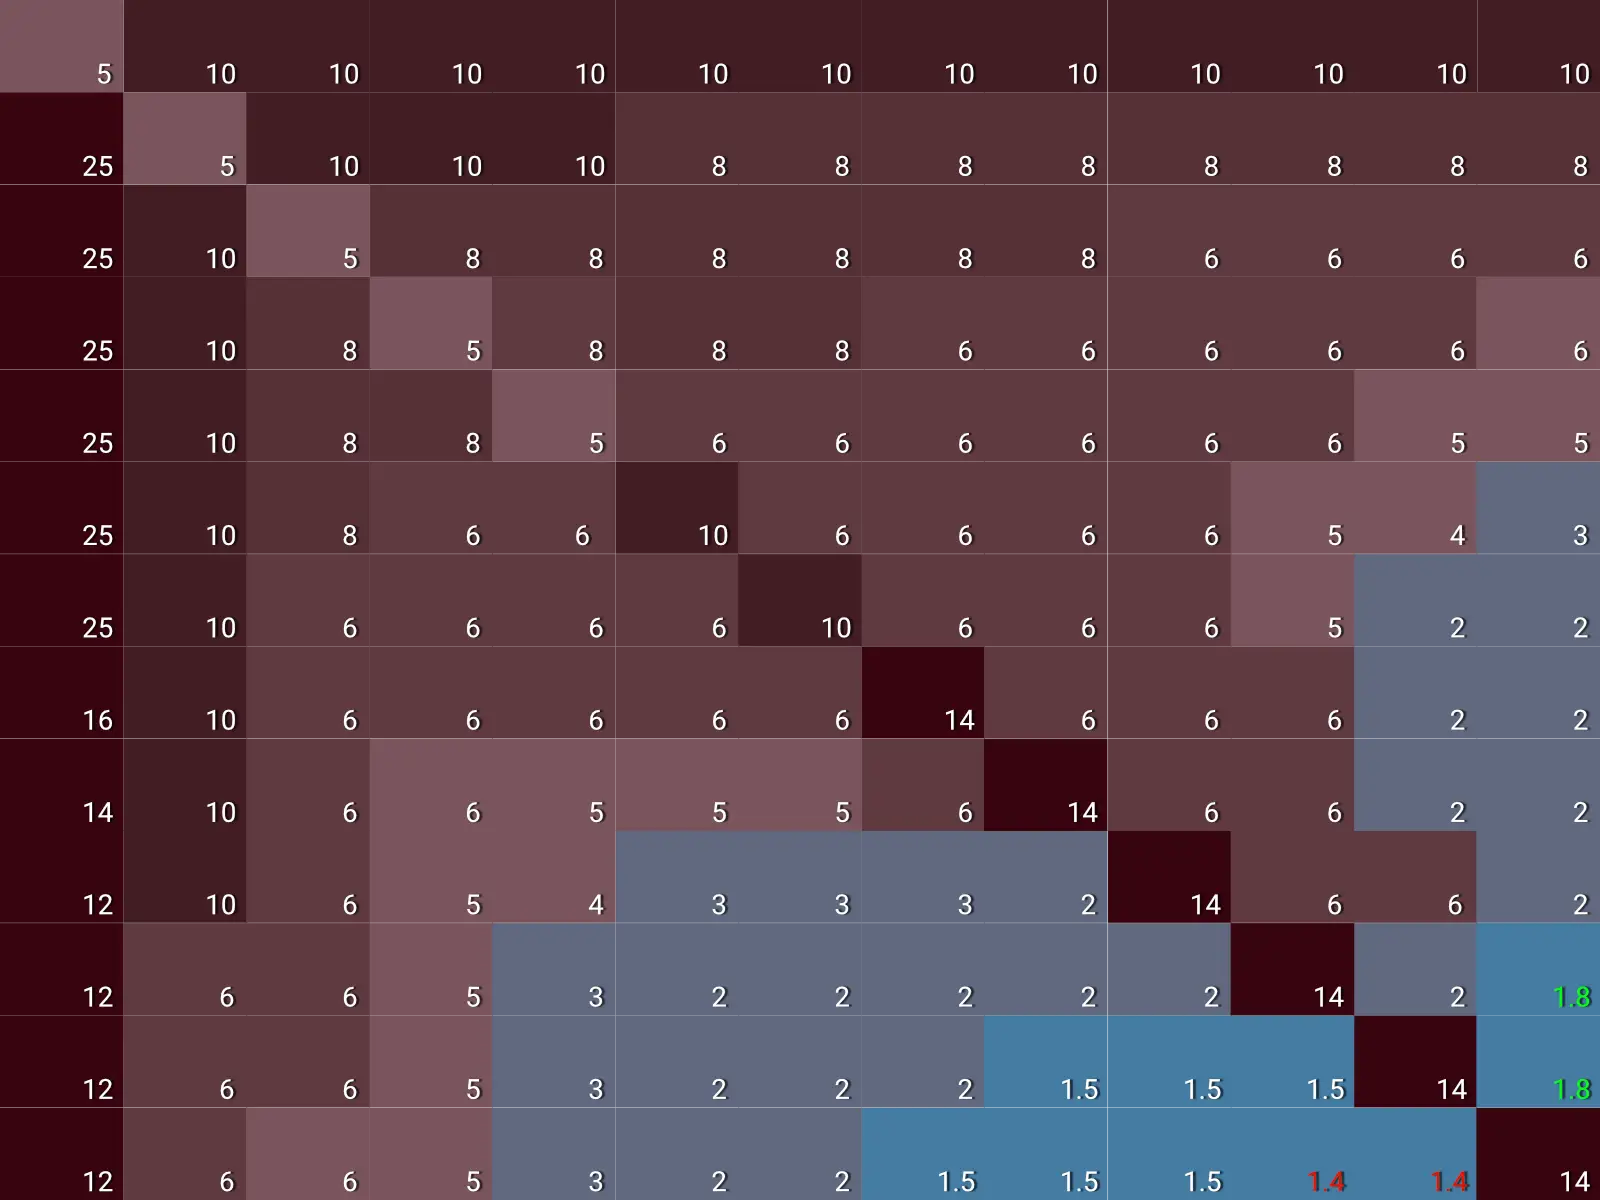
The Exploitative Charts were calculated by a solver using over one million hands played against recreational players.
They exploit their frequent mistakes to maximize your winnings.
→ Against recreational players, follow the actions recommended by these Charts.
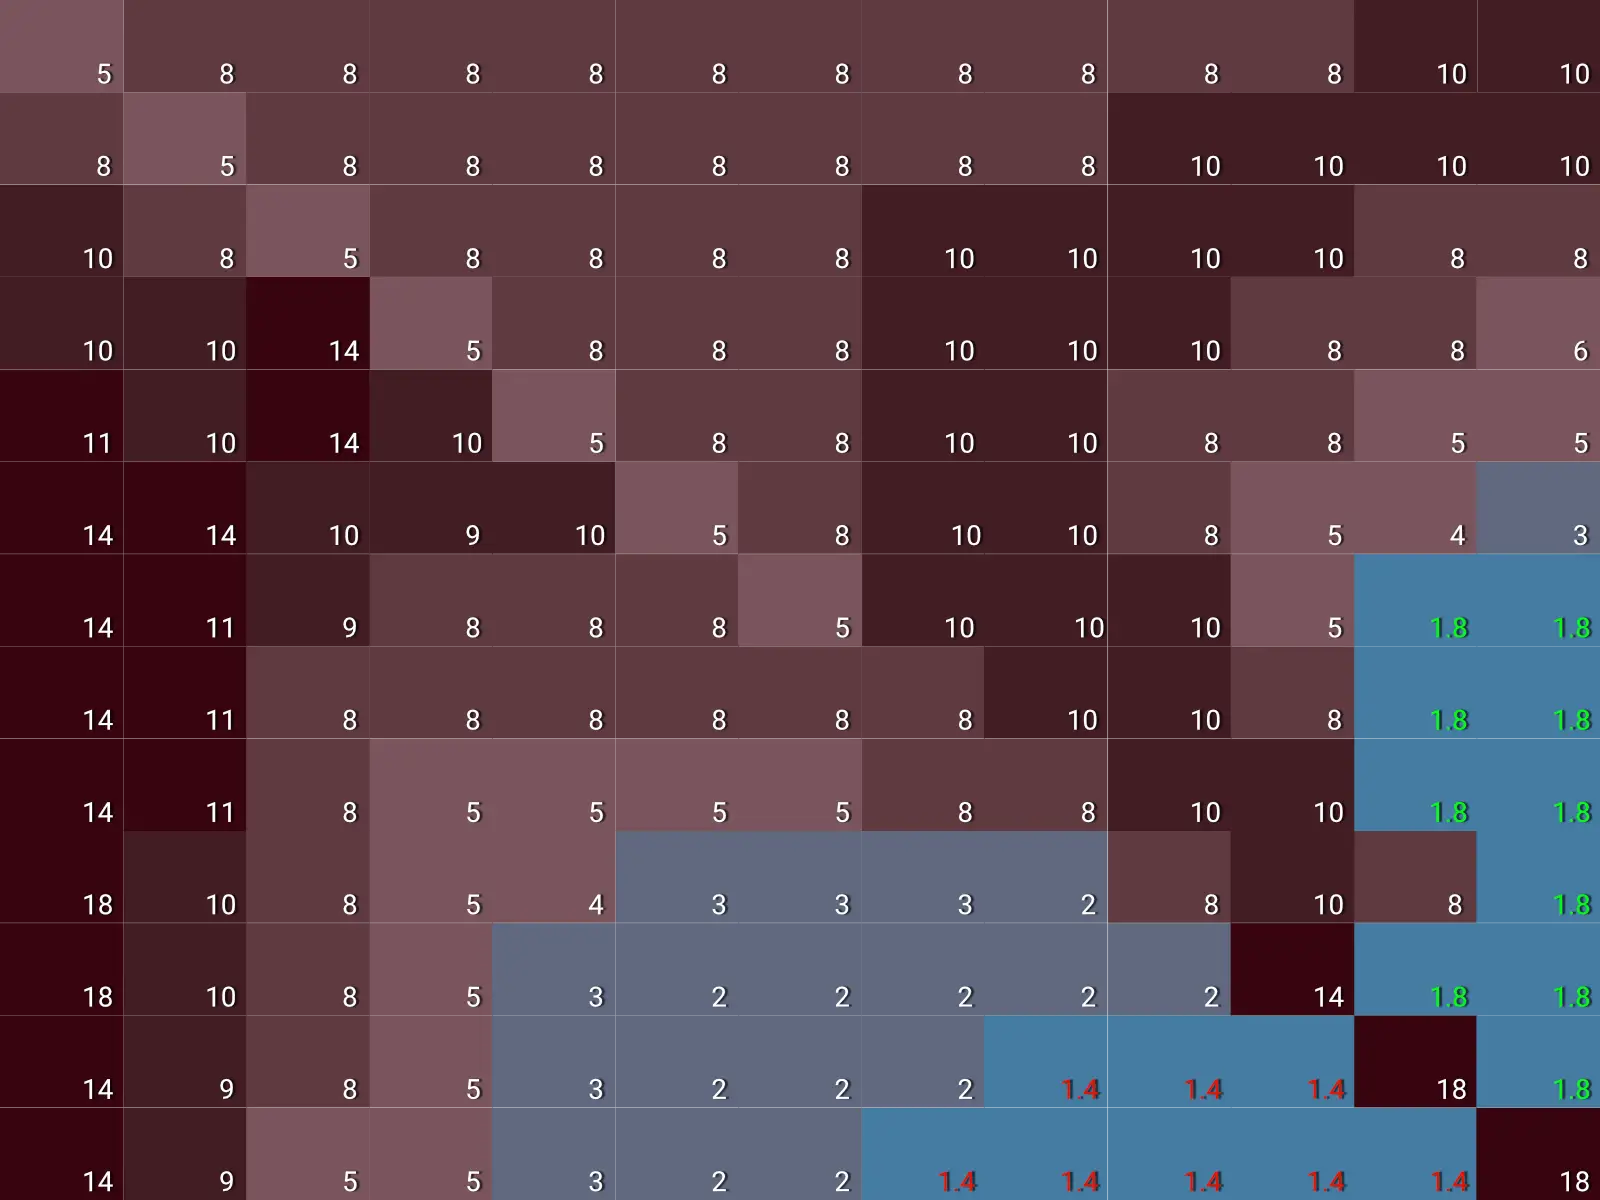
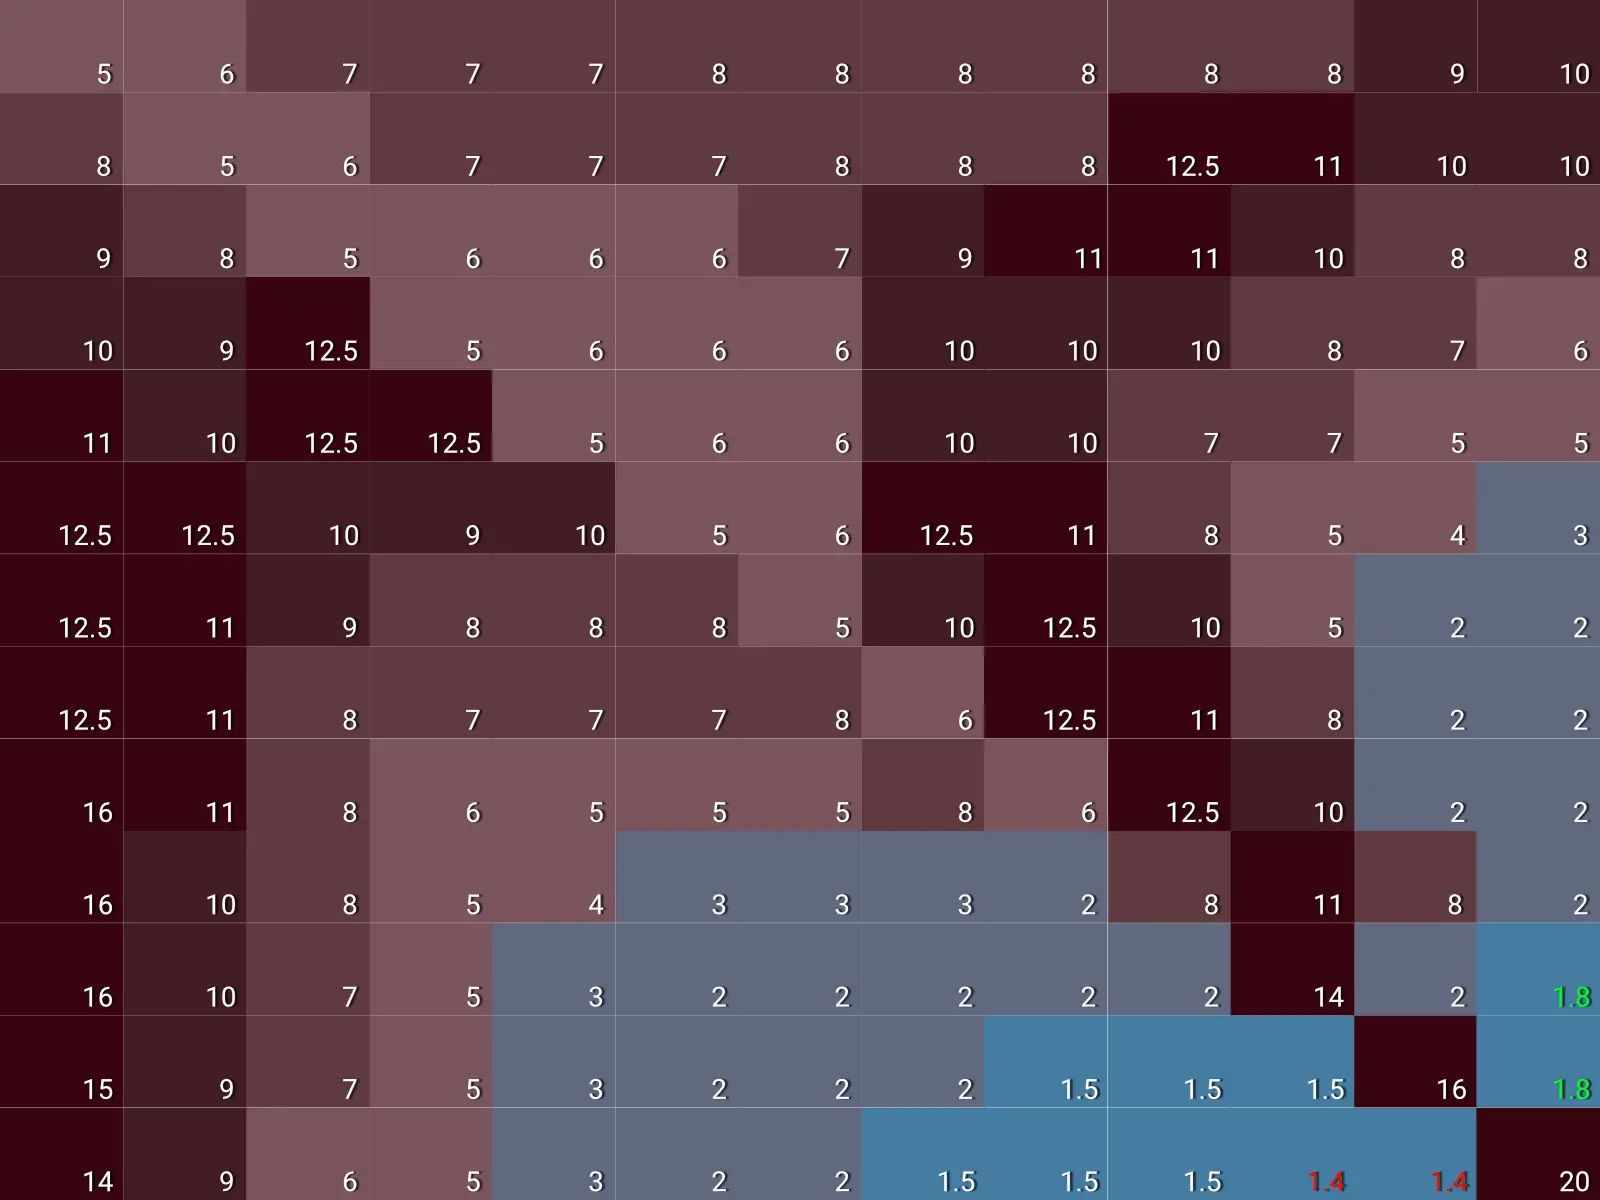
GTO gives you a perfectly unexploitable strategy — meaning that even the best poker AI would be unable to win money against you.
→ Against strong regulars at your tables, follow the actions recommended by the GTO Charts.
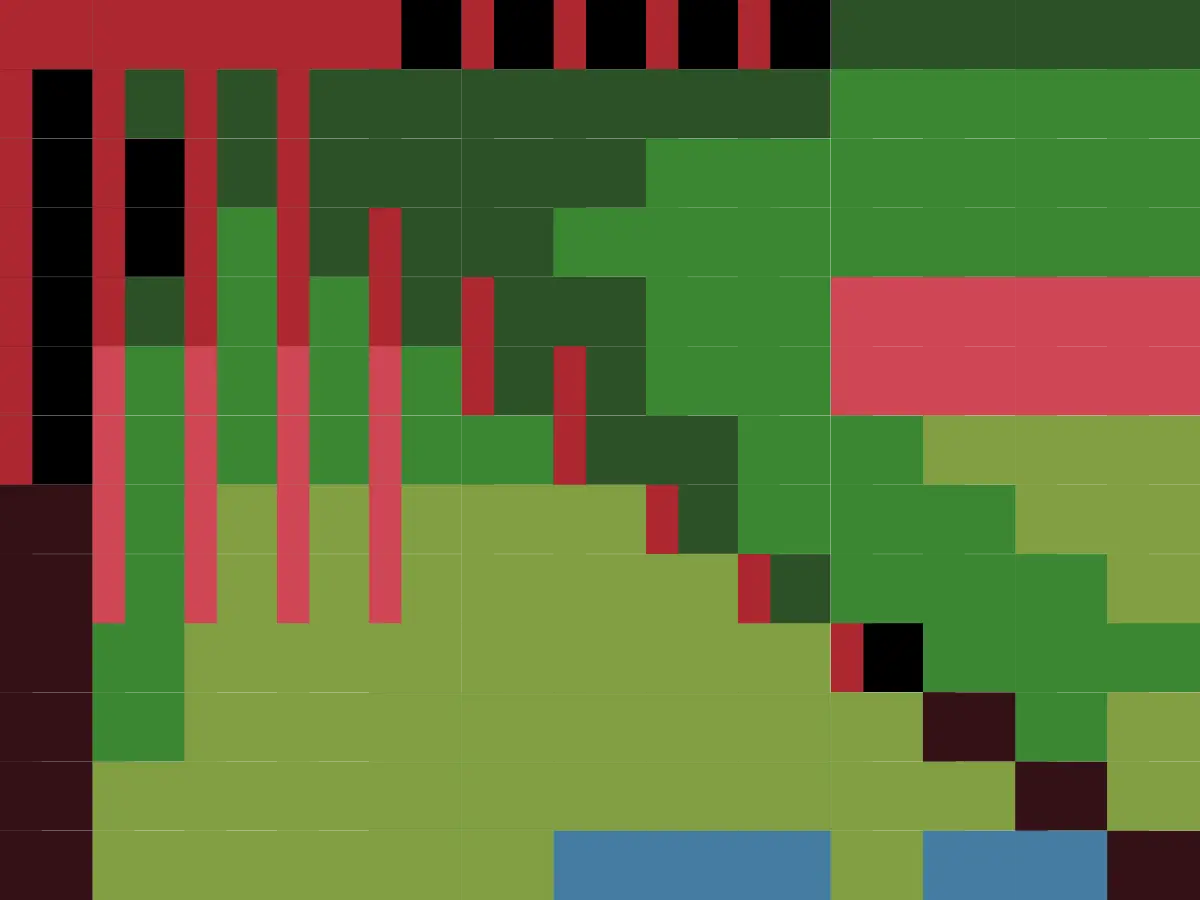
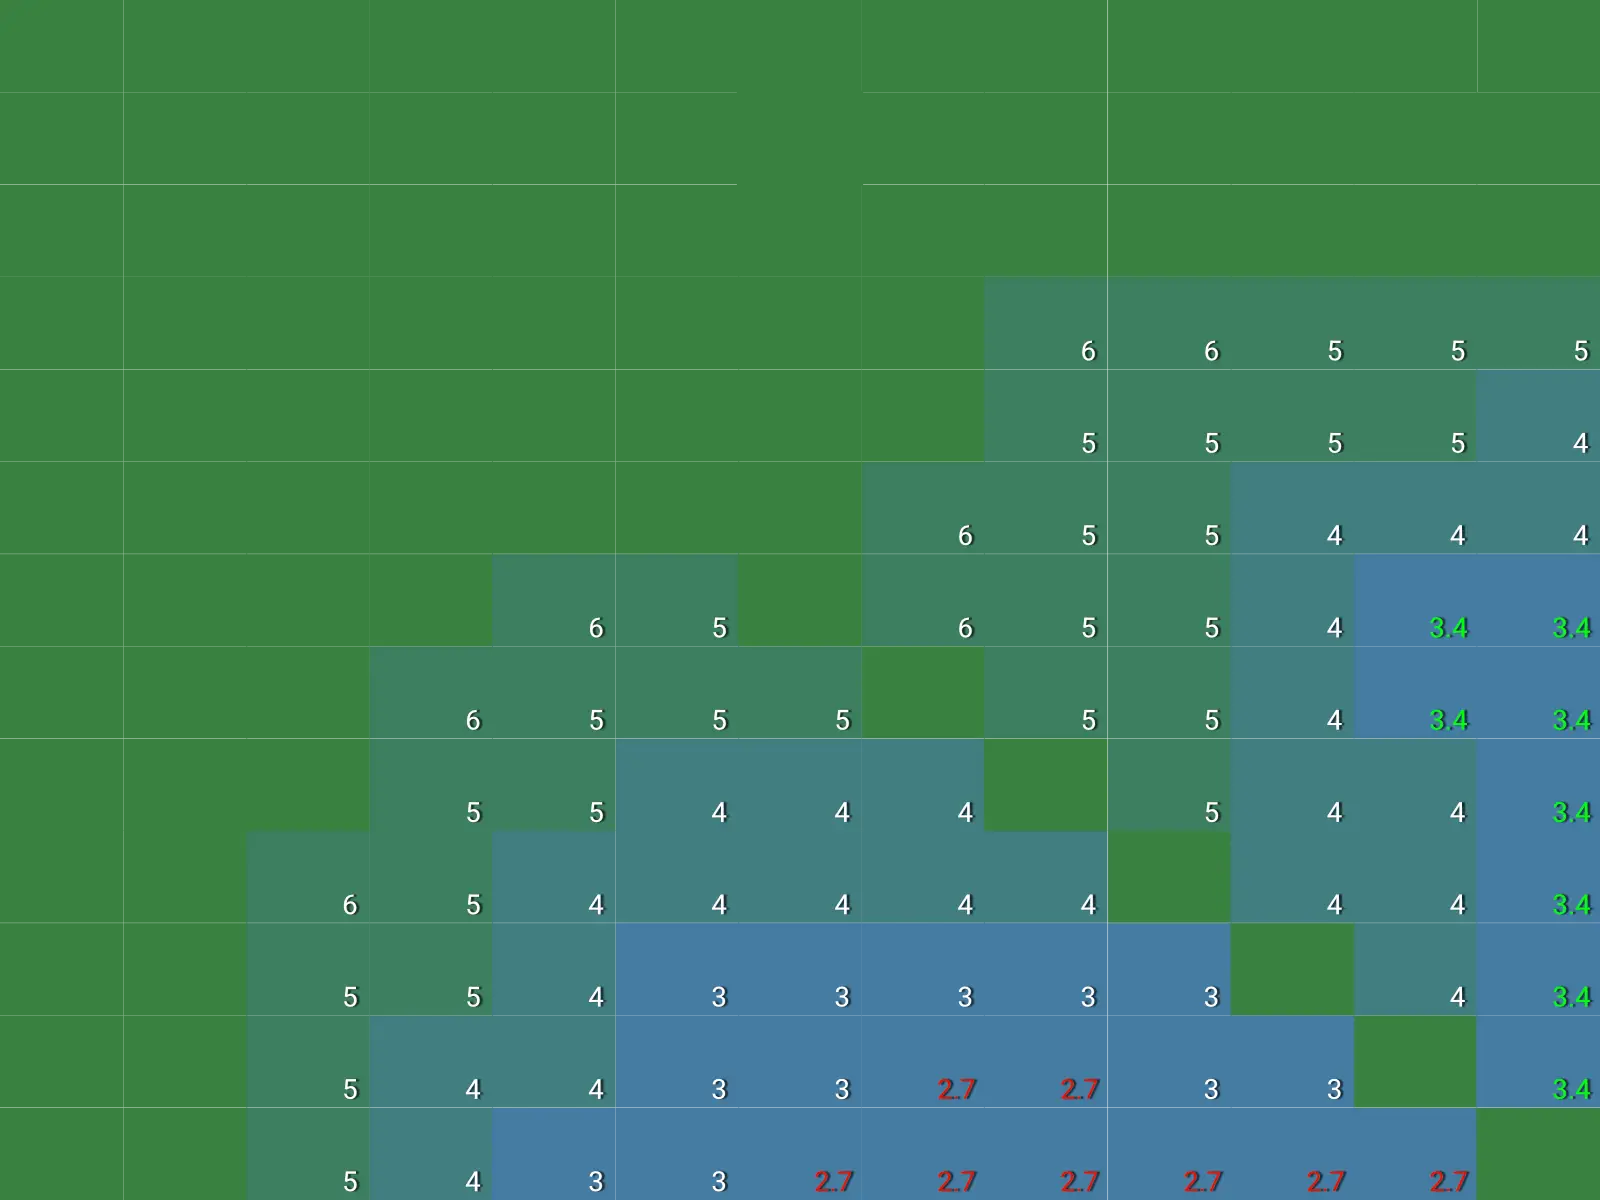
Comparing GTO and Exploitative play is also very useful to understand how and why the Exploitative strategy deviates from GTO against recreational players.
We explore these comparisons throughout the Strategy Guides.
In poker, you are in "3-max" when there are 3 players at the table.
In 3-max, you will alternately be in the Button (BTN), Small Blind (SB) and Big Blind (BB).
In poker, you are in "Heads-up" when there are only two players left at the table.
In Heads-up, you will alternately be in the Small Blind (SB) and Big Blind (BB).
Note that in Heads-up, the Small Blind acts first preflop but last post-flop.
Not all situations have the same importance. Some occur more frequently, others involve bigger pots.
To help you prioritize your learning, we use two simple symbols:
- The “1 chip” symbol (important situation): frequent and/or associated with a high average pot.
- The “2 chips” symbol (very important situation): very frequent and/or associated with a very high average pot.
The V1 charts are our default ranges, and should be prioritized.
V2, sometimes detailed in the Strategic Guides, is an alternative strategy.
V2 is generally just as profitable, but either more high variance, harder to memorize, or more technically demanding to execute correctly.